Tips for Maxkgo Smart BMS Firmware Upgrade (ENNOID-BMS-TOOL V5.2 )
, by MAXKGO COMPANY, 1 min reading time

, by MAXKGO COMPANY, 1 min reading time
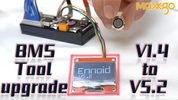
We showed "How the BMS communicates with the VESC tool" in a previous blog. In this blog, we will use Maxkgo All-in-one Smart BMS board to demonstrate the firmware upgrade of ENNOID-BMS-Tool.
USB cable
(Since we are using a 12S battery pack, we wire it according to the 12S wiring diagram)
After completing the wiring, turn on the BMS switch, and the LED screen will display the firmware version V1.3 (the firmware is 1.4, and it will display 1.3 after burning)
Connect the BMS board to the computer with a USB cable, and open the firmware version 5.2 to upgrade.
① Click "Connection" > Click "Refresh" > Click to connect to BMS > Click "ok".
② Click "Firmware"> Tick√ "Show non-default firmware" >Click to download version 5.2> Choose "YES".
③ After Click “OK”, the firmware 5.2 starts downloading


④ After the firmware download is complete, click "ok"
⑤ Click "Cell Management"> Fill in "Cell monitor count" according to the BMS type> Fill in "Cells in series" according to the battery pack specification> Click to download the program> Click "Save"> Click to disconnect the USB port.
(After the download of the new firmware, the battery specification information must be rewritten into the BMS_Tool. )

Here is the video link: https://youtu.be/pDcW2iFh1xY
Thank you for your patience in reading, see you in the next blog.
Please follow our social media for more info, thanks.
YouTube: https://www.youtube.com/@MAXKGO
Instagram: https://www.instagram.com/maxkgo_share/
Facebook: https://www.facebook.com/MaxkgoMall


